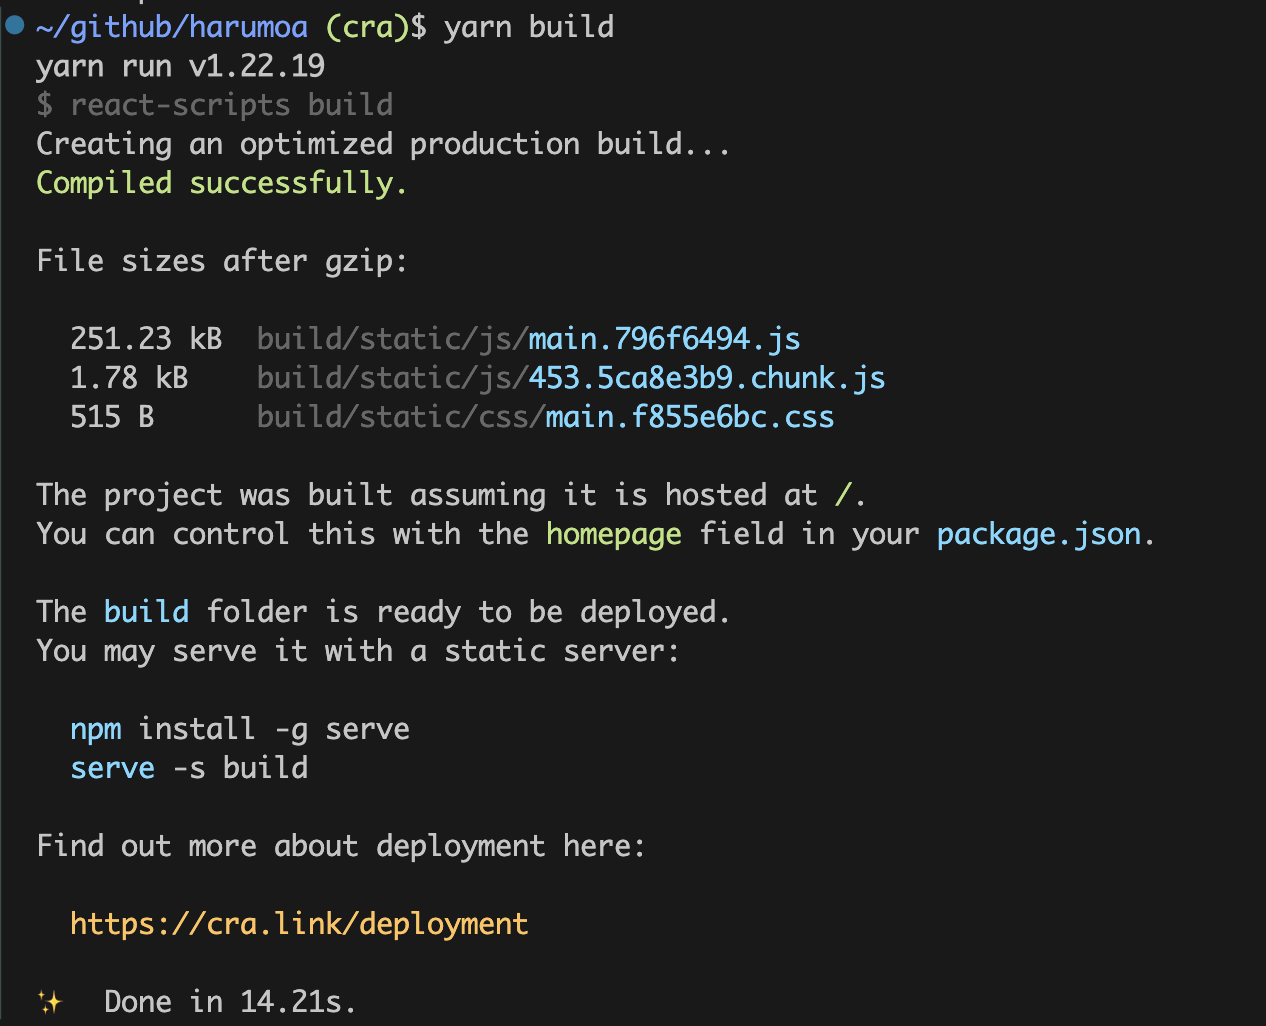
CRA로 생성한 토이 프로젝트를 Vite로 전환해봤습니다. 프로젝트의 규모가 작아 크게 차이가 있을까? 싶었는데, 마이그레이션 후 빌드 시간이 향상된 것을 확인할 수 있었습니다.
CRA를 사용한 빌드 시간:
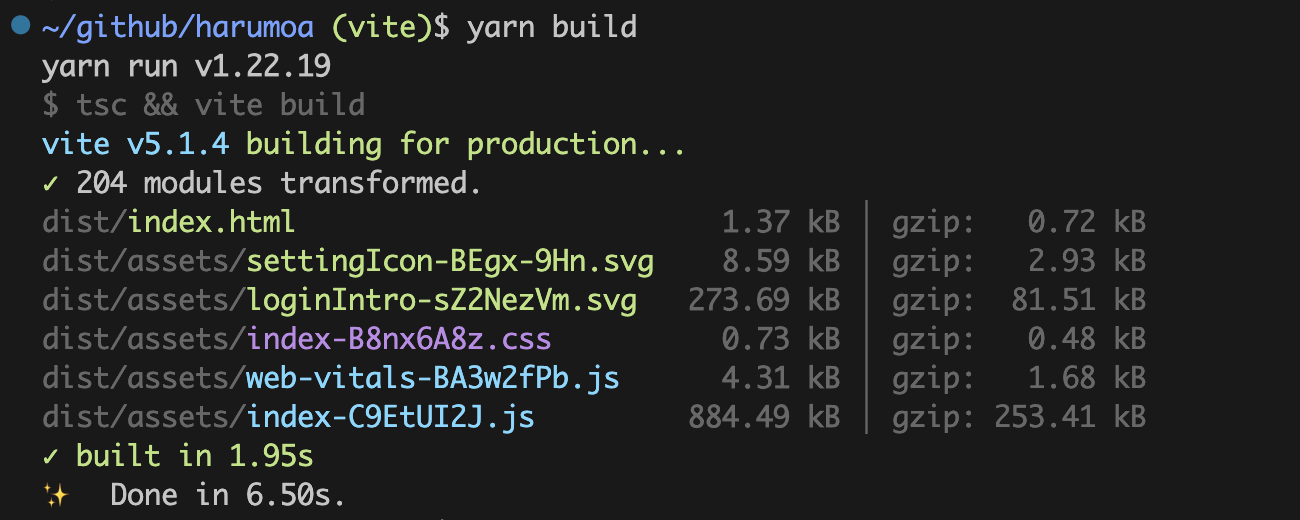
Vite를 사용한 빌드 시간:
마이그레이션 과정
1. dependencies 설치
npm install --save-dev vite @vitejs/plugin-react vite-plugin-svgr
npm install --save-dev vite @vitejs/plugin-react vite-plugin-svgr
vite-plugin-svgr: Vite 플러그인을 사용하여 SVG를 React 컴포넌트로 변환
2. vite.config.ts 파일 생성
import { defineConfig } from 'vite';
import react from '@vitejs/plugin-react';
import svgr from 'vite-plugin-svgr';

// https://vitejs.dev/config/
export default defineConfig({
  plugins: [react(), svgr()],
});
import { defineConfig } from 'vite';
import react from '@vitejs/plugin-react';
import svgr from 'vite-plugin-svgr';

// https://vitejs.dev/config/
export default defineConfig({
  plugins: [react(), svgr()],
});
3. index.html 파일 이동 및 수정
Vite 프로젝트에서는 index.html 파일이 public 디렉토리에 위치하는 것이 아니라 프로젝트의 루트에 있습니다. 이는 개발 중에 Vite가 서버로 동작하며, index.html이 애플리케이션의 진입점이기 때문입니다.
index.html은 Vite에 의해 소스 코드로 취급되며 모듈 그래프의 일부로 취급됩니다. <script type="module" src="...">와 같은 JavaScript 소스 코드를 참조하는 스크립트를 해결합니다. 인라인 <script type="module"> 및 <link href>를 통해 참조된 CSS도 Vite 특정 기능을 활용할 수 있습니다.
또한, index.html 내의 URL은 자동으로 다시 기준이 되어 특별한 %PUBLIC_URL% placeholder가 필요하지 않습니다.
Vite 공식 문서의 Getting Started에 설명된 바에 따라 /public에 있는 index.html 파일을 프로젝트의 루트로 옮기고, index.html 파일 내의 %PUBLIC_URL% placeholder를 제거합니다.
<!-- 전 -->
<link rel="icon" href="%PUBLIC_URL%/favicon.ico" />

<!-- 후 -->
<link rel="icon" href="/favicon.ico" />
<!-- 전 -->
<link rel="icon" href="%PUBLIC_URL%/favicon.ico" />

<!-- 후 -->
<link rel="icon" href="/favicon.ico" />
그 다음 프로젝트의 진입점인 엔트리 포인트를 지정하기 위해 body에 script를 추가합니다.
<body>
  <div id="root"></div>
  <script type="module" src="/src/index.tsx"></script>
</body>
<body>
  <div id="root"></div>
  <script type="module" src="/src/index.tsx"></script>
</body>
<script type="module" src="/src/index.tsx"></script>라는 스크립트 태그는 Vite에게 프로젝트의 진입점인 index.tsx 파일을 로드하도록 지시하는 것입니다. 따라서 이 스크립트 태그는 애플리케이션의 시작점을 나타내며, Vite는 이를 기반으로 모듈을 해석하고 번들을 생성합니다.
4. tsconfig.json 수정
{
  "compilerOptions": {
    "target": "ESNext",
    "lib": ["DOM", "DOM.Iterable", "ESNext"],
    "types": ["vite/client", "vite-plugin-svgr/client"],
    "allowJs": false,
    "skipLibCheck": false,
    "esModuleInterop": false,
    "allowSyntheticDefaultImports": true,
    "strict": true,
    "forceConsistentCasingInFileNames": true,
    "noFallthroughCasesInSwitch": true,
    "module": "ESNext",
    "moduleResolution": "node",
    "resolveJsonModule": true,
    "isolatedModules": true,
    "noEmit": true,
    "jsx": "react-jsx"
  },
  "include": ["src"]
}
5. vite-env.d.ts 파일 생성
src 폴더에 vite-env.d.ts 파일을 생성합니다.
/// <reference types="vite/client" />
/// <reference types="vite/client" />
6. 환경변수 수정
환경변수 prefix를 REACT_APP에서 VITE로 변경합니다.
VITE_API_KEY=your-api-key
VITE_ENVIRONMENT=production
VITE_API_KEY=your-api-key
VITE_ENVIRONMENT=production
기존의 CRA에서 process.env를 사용한 것과 달리, Vite는 import.meta.env를 사용해 환경 변수에 접근할 수 있습니다.
const apiKey = import.meta.env.VITE_API_KEY;
const environment = import.meta.env.VITE_ENVIRONMENT;
const apiKey = import.meta.env.VITE_API_KEY;
const environment = import.meta.env.VITE_ENVIRONMENT;
7. react-scripts 제거
npm uninstall react-scripts
npm uninstall react-scripts
react-scripts는 CRA 프로젝트의 개발 및 빌드 스크립트를 제공하는 패키지이기 때문에 Vite에서는 필요하지 않습니다. Vite는 자체 개발 서버와 빌드 시스템을 사용하므로 react-scripts에 의존할 필요가 없습니다.
react-app-env.d.ts 파일은 CRA 프로젝트에서 TypeScript를 사용할 때, TypeScript에게 프로젝트의 환경과 관련된 타입 정보를 제공하는 역할을 하므로 이 파일도 Vite로 전환하면서 제거해도 무방합니다.
8. package.json script 수정
"scripts": {
  "dev": "vite",
  "build": "tsc && vite build",
  "preview": "vite preview"
},
"scripts": {
  "dev": "vite",
  "build": "tsc && vite build",
  "preview": "vite preview"
},
🛠️ 트러블슈팅
패키지 버전 충돌
npm install을 실행했을 때 에러가 발생했습니다. 에러 메시지를 살펴보니 @types/node 패키지의 버전 요구사항이 명시되어 있었습니다.
여기서 ^18.0.0 || >=20.0.0는 @types/node 패키지의 버전이 18.0.0 이상 또는 20.0.0 이상이어야 한다는 것을 의미합니다. 그런데 현재 프로젝트에서 사용 중인 버전은 @types/node@16.18.83로, 요구사항을 충족하지 못하고 있습니다.
이 메시지를 토대로 @types/node 패키지를 업데이트하여 종속성 충돌을 해결할 수 있었습니다.
npm install @types/node@latest
npm install @types/node@latest
SVG export 에러
Uncaught SyntaxError: The requested module '/src/assets/icons/addCircle.svg?import' does not provide an export named 'ReactComponent’
vite-plugin-svgr GitHub 저장소에서 4.0.0 버전 이후에는 SVG 파일을 React 컴포넌트로 가져오는 방식이 변경되었음을 확인했습니다. 이전 버전에서는 ReactComponent를 사용하여 import하는 방식이었지만, 4.0.0 이상 버전에서는 ?react 쿼리를 사용하는 방식으로 변경되었습니다.
// 기존 코드
import { ReactComponent as AddSVG } from 'assets/icons/add.svg';

// v4.0.0 이상
import AddSVG from 'assets/icons/add.svg?react';
// 기존 코드
import { ReactComponent as AddSVG } from 'assets/icons/add.svg';

// v4.0.0 이상
import AddSVG from 'assets/icons/add.svg?react';
위 방법으로 해결할 수 있지만 프로젝트에서 대부분 SVG를 ReactComponent로 사용하고 있기 때문에 코드를 수정하지 않고, vite-plugin-svgr 대신 @svgr/rollup을 사용했습니다.
npm install --save-dev @svgr/rollup
npm install --save-dev @svgr/rollup
// vite.config.ts

import { defineConfig } from 'vite'
import react from '@vitejs/plugin-react'
import svgr from '@svgr/rollup'

// https://vitejs.dev/config/
export default defineConfig({
  plugins: [react(), svgr()],
})
// vite.config.ts

import { defineConfig } from 'vite'
import react from '@vitejs/plugin-react'
import svgr from '@svgr/rollup'

// https://vitejs.dev/config/
export default defineConfig({
  plugins: [react(), svgr()],
})
TypeScript에서 SVG 파일 처리
그런데 ReactComponent를 사용하여 import한 코드에서 에러가 발생했습니다.
import { ReactComponent as AddSVG } from 'assets/icons/add.svg';
import { ReactComponent as AddSVG } from 'assets/icons/add.svg';
Module '".svg"' has no exported member 'ReactComponent'. Did you mean to use 'import ReactComponent from ".svg"' instead?
StackOverflow에서 해결 방법을 찾을 수 있었습니다. SVG 파일을 React 컴포넌트로 사용할 때, TypeScript에서 해당 SVG 모듈이 React 컴포넌트임을 명시해주지 않으면 TypeScript 컴파일러가 해당 모듈에서 ReactComponent를 찾을 수 없다는 에러가 발생합니다.
먼저 svg.d.ts 파일을 생성하고 아래 코드를 추가하여 TypeScript에게 SVG 파일이 React 컴포넌트임을 알려줍니다.
declare module '*.svg' {
  import React = require('react')
  export const ReactComponent: React.FC<React.SVGProps<SVGSVGElement>>
  const src: string
  export default src
}
declare module '*.svg' {
  import React = require('react')
  export const ReactComponent: React.FC<React.SVGProps<SVGSVGElement>>
  const src: string
  export default src
}
그 다음 tsconfig.json 파일의 include에 svg.d.ts를 추가합니다.
"include": ["src", "svg.d.ts"]
"include": ["src", "svg.d.ts"]
이렇게 하면 TypeScript 컴파일러가 해당 디렉토리에 있는 타입 정의 파일을 찾아 해당 타입 정의를 사용할 수 있게 됩니다.
Vite CJS Node API 사용 중단
npm run dev 실행 시 개발 서버는 잘 시작되지만 아래와 같은 경고 메시지가 나왔습니다.
The CJS build of Vite's Node API is deprecated. See https://vitejs.dev/guide/troubleshooting.html#vite-cjs-node-api-deprecated for more details.
이 경고 메시지는 Vite의 CommonJS (CJS) 빌드가 폐지되고 더 이상 지원되지 않을 예정이라는 내용을 알려주는 메시지입니다. 이러한 변경 사항에 대한 자세한 내용과 대응 방법은 Vite 공식 문서의 Troubleshooting에 안내되어 있습니다.
저의 경우 package.json 파일에 "type": "module"을 추가하여 해결했습니다. 이렇게 하면 프로젝트 전체에서 ECMAScript Modules(ESM) 문법이 사용되도록 설정됩니다. 이는 파일 확장자가 .js인 모든 파일이 ESM으로 해석되도록 합니다.
만약 TypeScript를 사용하는 경우에도 .ts 파일은 ESM으로 처리됩니다. 단, tsconfig.json의 "module" 설정이 "ESNext" 또는 "ES6"로 되어 있어야 합니다.
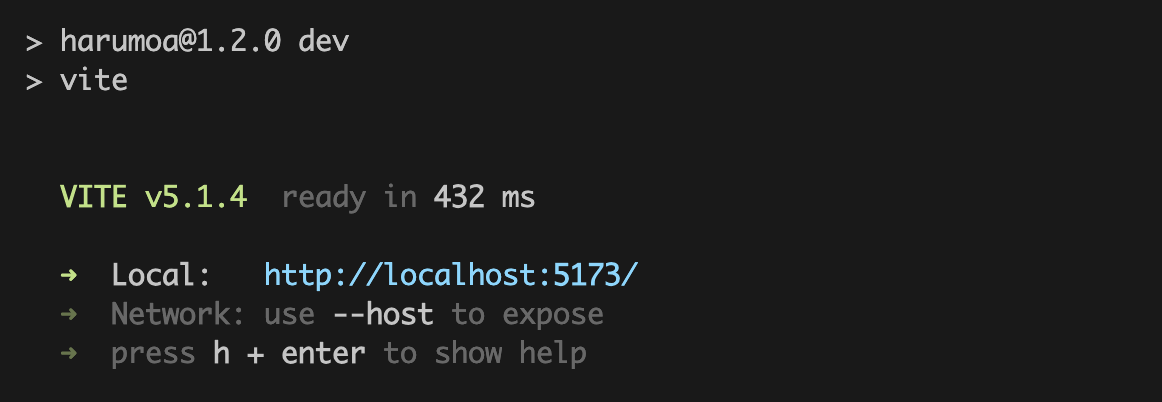
이후 경고 메시지 없이 개발 서버가 실행되는 것을 확인할 수 있었습니다.